![]()
When dealing with overseas manufacturers, there are often times when we have to translate comments into their language.
This applies to sewing instructions as well, but I think the most common case is when inspecting the samples that have come in.
When translating, of course, you may be using your own abilities, or you may be looking at the old yellow apparel dictionary.
More recently, we have seen an increase in the use of excellent translation sites such as Google Translate and DeepL.
In this article, we will show you how to use the API of DeepL and incorporate it into Claris FileMaker Custom Apps that you have created yourself.
We recommend you to use the paid version of the software for full-scale use, but for the time being, you can use the software for free.
There are many sewing-related terms that are unique and technical terms that are generally difficult to translate, but you can use the glossary at DeepL to grow your level of translation.
Here are the steps
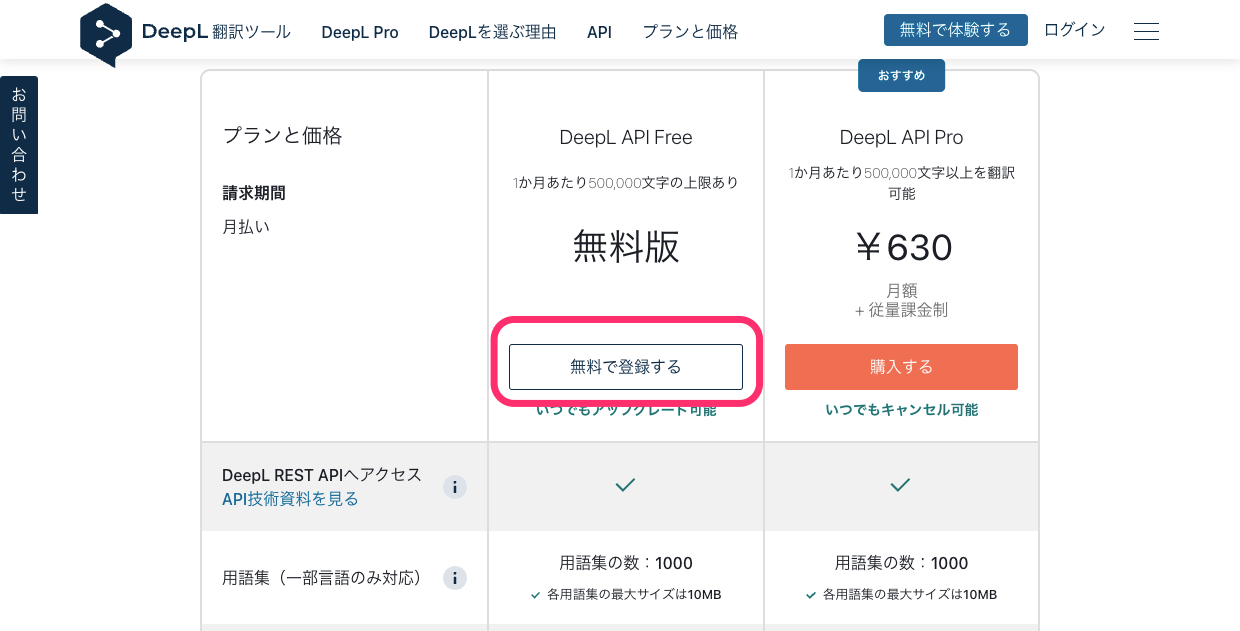
1. Go to the DeepL site and register for free membership.

2. Go to the middle of the screen and press “Register for free” to register.
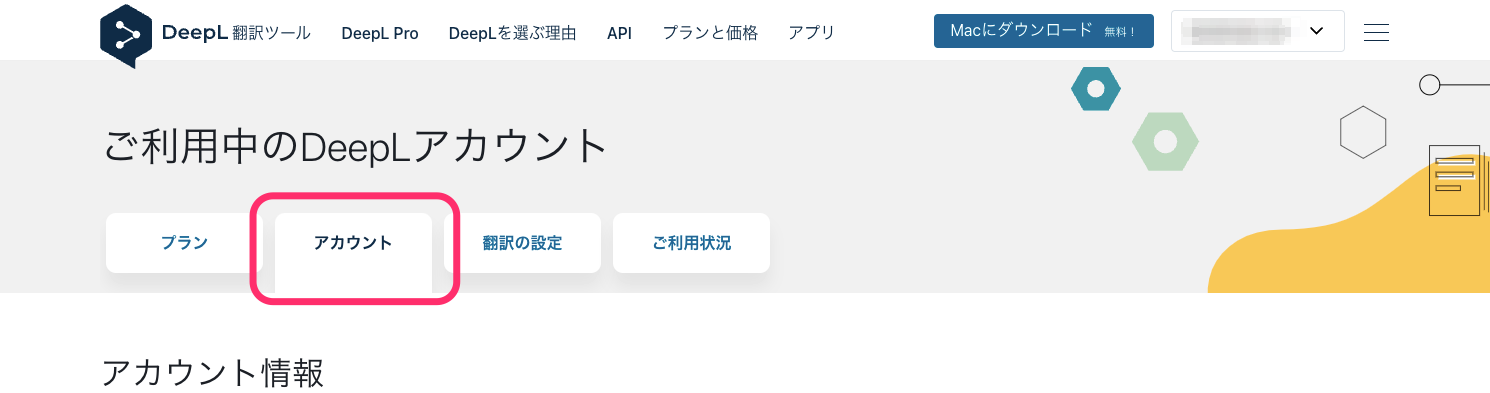
3. After registering, go to DeepL developer site and go to “Account” in the upper right corner.
https://www.deepl.com/ja/docs-api/
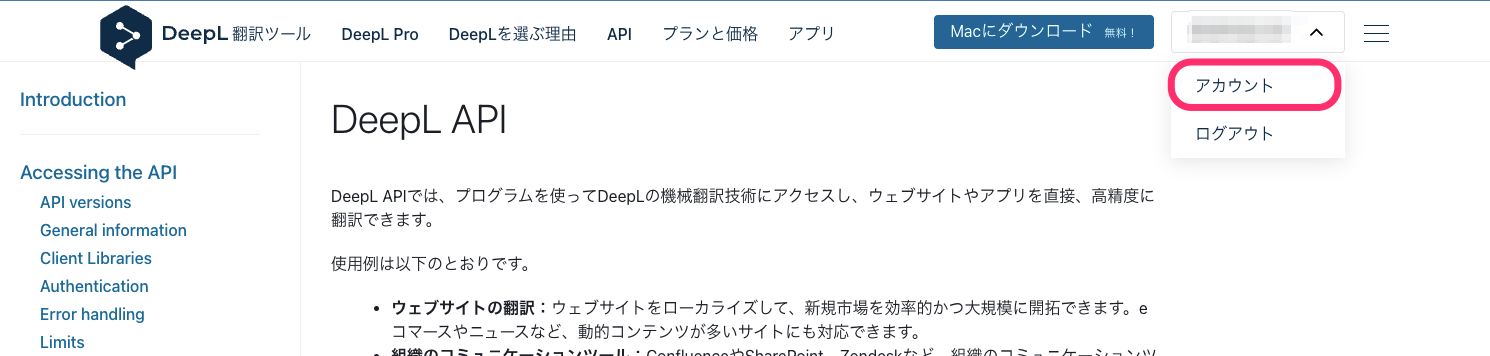
4. Copy the “DeepL authentication key used for API” in the “Account” tab, as it is required for this API use.
5. From here, we will create Claris FileMaker Custom Apps.
Below is the completed diagram.
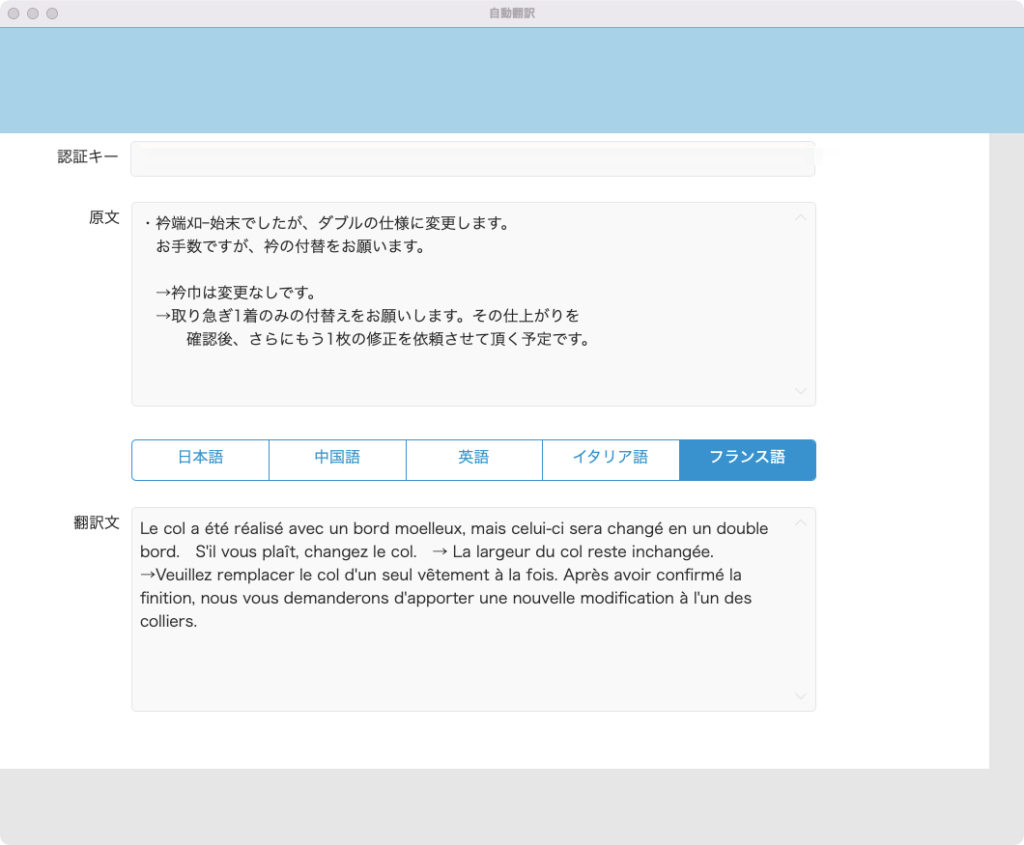
The main flow is that you enter the source text, select the language with the button, and the source text and the language you want to translate are sent to DeepL.
The excellent DeepL automatically detects the received language, converts the source text into the language you want to translate, and returns the translated text.
At this time, you will need the “authentication key used by DeepL API” that you have just obtained.
6. We will follow along with this sample file. Although global fields are used, they do not have to be global fields.
Field Name type Options/Comments
g_text 1 Text Global Enter the original text
g_text 2 Text Global Translated text retrieved from DeepL will be entered
g_lang Text Global Set the language to be translated
g_authentication_key Text Global Authentication key for DeepL
7. We will create a script.
The script is only 3 lines long.
Moreover, I see that the DeepL site describes what to set up, including the authentication key.
Basically, we will use this as is.
7. We will create the actual script.
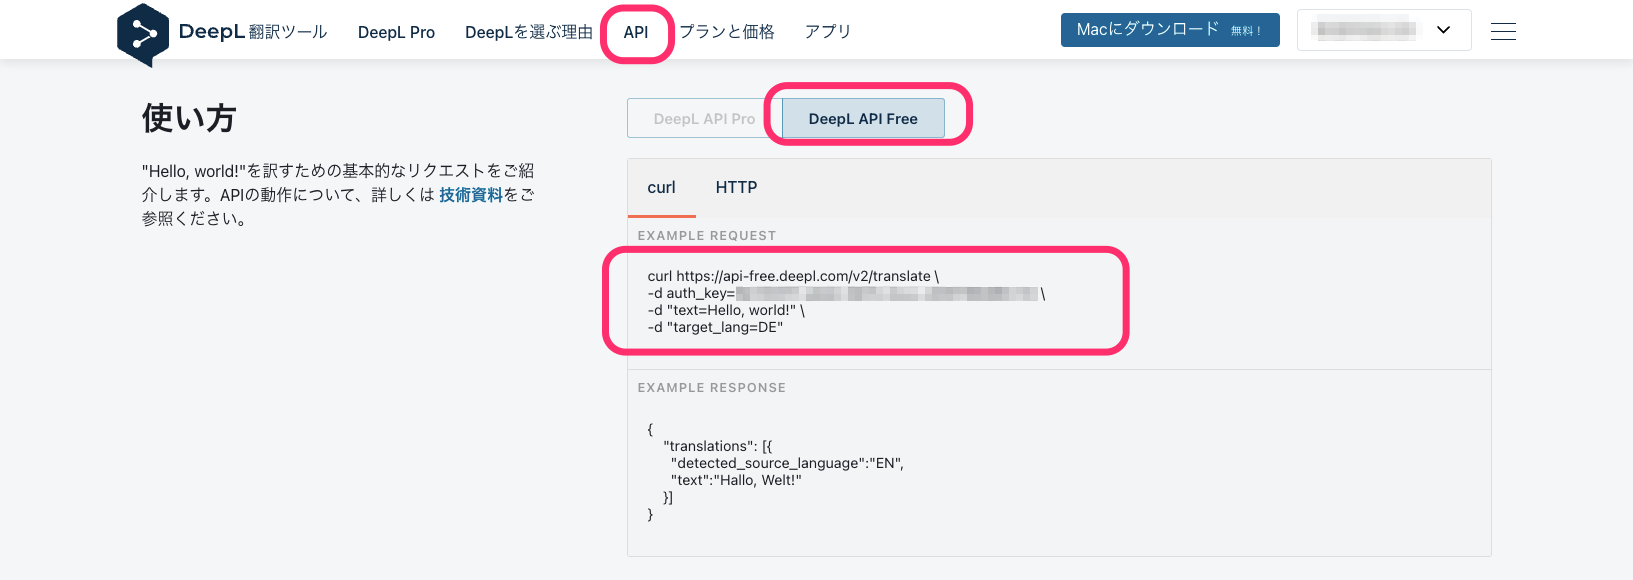
Let’s review what you have just copied from the DeepL website.
Replace “Authentication Key” below with your own authentication key.
curl https://api-free.deepl.com/v2/translate \

-d auth_key=authentication key \

-d "text=Hello, world!" \

-d "target_lang=DE"
The following is a breakdown of the file that is easy to grasp in Claris FileMaker.
destination URL: https://api-free.deepl.com/v2/translate \
Authentication key: Your own authentication key
Original: Hello, world!
Language to be translated: DE
Set a 2-letter code for the language to be translated.
EN if you want to translate it into English.
See “target_lang” on the following page for a list.
https://www.deepl.com/ja/docs-api/translating-text/request/
The following is the script
In actual Custom Apps, there is no need to use global fields.
Also, you do not need to use the button to translate, you can master the languages to be translated for each client in advance and automatically execute the translation script by using the script trigger “OnObjectSave” in the “Source” field.
Furthermore, since there is a slight time lag in translation, it would be a good idea to run the translation on the server side and have the translated text in the background to eliminate frustration during busy times.
1: Field Settings [ Auto Translate::g_lang ; Get ( script argument )

2: Insert from URL [ Select ; Dialog: off ; Target: $r ; "https://api-free.deepl.com/v2/translate" ; cURL option: " -d auth_key=" & auto-translation::g_authentication_key & " -d \"text=" & auto-translation::g_text 1 &"\" & " -d \"target_lang=" & auto-translation::g_lang &"\"]

3: Field Settings [ automatic, machine translation::g_text 2 ; JSONGetElement ( $r ; "translations[].text" ) ]
○ treatment
Enter the authentication key and the original text, and press the language button to display the translated text.