Categories
docs

Register or change your company’s information (for administrators)

Register or change your company’s information (for administrators)

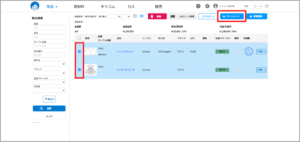
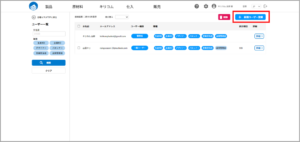
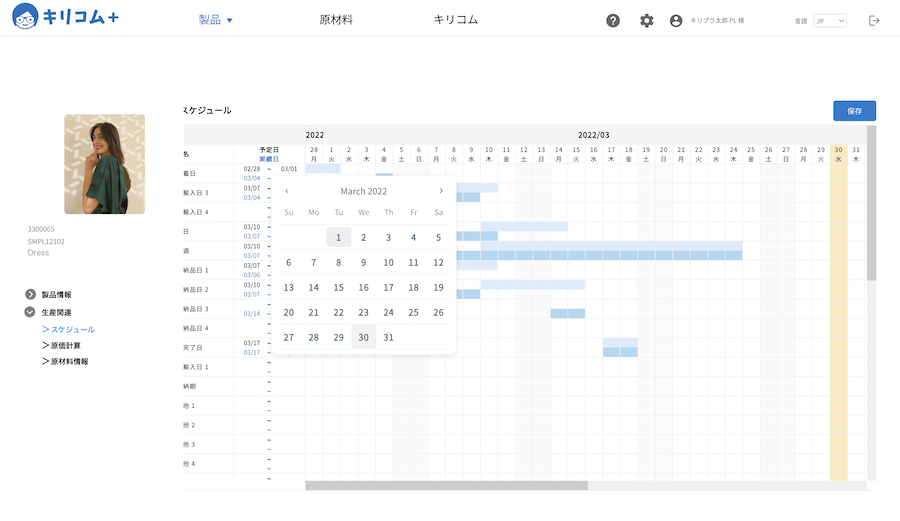
1 Press the ⚙ symbol in the upper menu to move to the various master screens.


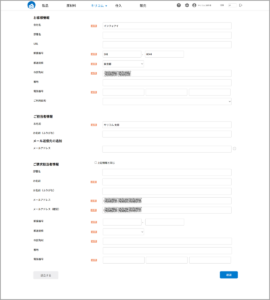
2 Company/User Information [Company Information] → Go to the registration screen.

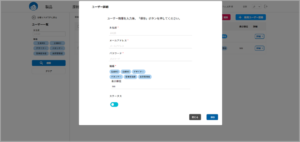
The information you provided when you registered as a member is reflected here.

Register or change the information, click “Confirm”, and “Save” if you are satisfied with the content.

Categories
docs

Register as a new user (multiple users)

Register as a new user (multiple users)

The first user registered at your company will be the [Administrator].

The user will appear at the top of the list as [Administrator] in the user information.

1 If multiple people are using the system, please register as the administrator.
Click the ⚙ symbol in the upper menu → Company/User Information related [Company Information] to move to the User List screen.


2 Click [+ New User Registration] in the upper right corner of the screen.

3 Go to the user details screen, register, and click [Save].

When you select a job title, it will also appear in the list.


Categories
docs

Register a business partner

Register a business partner

1 Go to ⚙ mark in the upper menu → Product Related [Suppliers] → Suppliers List screen

2 Press [+New Registration] in the upper right corner of the screen.

3 Display of customer information registration screen

Register the name of the business partner, contact person, e-mail address, address, etc.

In the Basic Information tab, the supplier code is a required field.
Once the supplier category is selected, it will appear in a pull-down list in the “Supplier” and “Factory” input fields of the product details and raw material details, allowing for selective input.

[You can also register a division/brand from the [Division/Brand] tab. In this case, the name of the person in charge and his/her e-mail address are required.

Categories
docs

Various master list screens

Various master list screens

master registration

If basic information is registered as a master,
This makes it easier to share information within the company and eliminates the need to register the same information over and over again.

Click the ⚙ mark in the upper menu→Various master list screen

Press the button for the item to be registered to move to the respective registration screen and register it according to the screen.

Production
Raw materials, profitability methods, trade forms, progress control items, etc., are tied to convenient functions related to production such as cost accounting and scheduling.

Product Related
It is tied to color, size, production status, company JAN code, and other useful functions of product details.
In-house and user information related
Confirmation of customer information or change/registration of customer information.

Categories
docs

Customize schedule items

Customize schedule items

General items in the schedule are defaulted, but can be customized by the customer


1 HOME Various Masters → Production [Progress Control Items], and move to the screen.
(The default progress control items are registered.)


2 JP (Japanese) and EN (English) are registered by default.
(If you wish to switch languages, register both JP and EN)

KIRIKOM PLUS

3 The schedule items you set are reflected in the process names in the production schedule

生産スケジュール画面

point

If a progress control item (process name) is changed, all part numbers will be changed (not by the person in charge).
Categories
docs

How to use the production calendar

How to use the production calendar

Once the production schedule is registered, the production calendar will display the image


1 HOME Products → [Production Calendar].

2 Go to the production calendar screen, and the image of the registered product will be displayed.
(If you have registered a schedule for a period of time, it will be displayed on the first day of the period)

KIRIKOM_Plus生産カレンダー

3 Press the image shown in the calendar to view the production schedule

Scroll left and right to see the registered dates.
You can also change the dates, be sure to [save] after making changes.

KIRIKOM PLUS

Categories
docs

Register a production schedule

Register a production schedule

1 HOMEProducts → Product List → Go to product detail screen


2 Press the left menu production-related [Schedule] on the screen.

KIRIKOM PLUS

((Note: Process names must be registered in advance in the “progress control item” master)


3 Register scheduled and actual dates (selected by calendar)


4 [Press [Save] to reflect the results in the table.

Categories
docs

Delete product (part number)

Delete product (part number)

1 HOMEProducts → Product List (List View)

2 Check the box ✔️ and press [Delete].

3 A confirmation alert message will appear. Click “OK” to complete the deletion.

Categories
docs

Register product color size

Register product color size

To register a color size, it is necessary to register the color and size in the master
(Register in the various masters → Product Related [Color] [Size])


1 HOMEProducts → Product List → Click [Color Size] on the left menu of the product details.


2 The master registered color size is displayed. ✔︎ and [Save].

3 A table will be created. Register the quantity and click “Save” (the total will be automatically calculated when the quantity is registered).

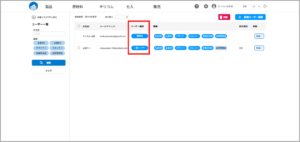
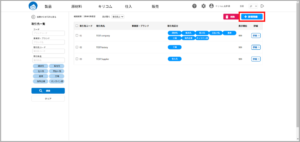
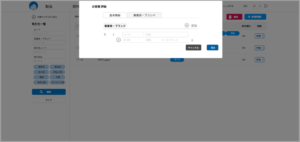
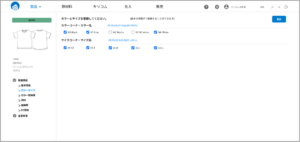
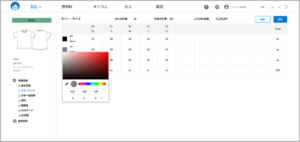
Color chips can also be changed with the color picker

4 After registration and [Save] is completed, the line sheet will reflect the new information.

Line Sheet

Categories
docs

Create a new line sheet

Create a new line sheet

line sheet

Planning information created by each person in charge can be combined into a single line sheet.
Products on a line sheet can be easily moved by dragging and dropping.

1 Press HOME (menu) line sheet.Move screen

2 Click [+Register New Line Sheet] in the upper right corner of the screen.

3 Press [+Add Product] in the upper right corner.

4 A screen appears to call products to be registered in the line sheet

Enter your search criteria in the upper row, and a list of hit products will be displayed at the bottom.

5 Check the box for the product to be added to the line sheet at ✔️ and press [Select].

6 A line sheet is created (register a title and press [Save] to complete saving).

The order (position) of each product can be moved by drag & drop


◆Line sheets can also be created from the Product List screen.

Check the products you wish to register on the line sheet, and press [+ Line Sheet] in the upper right corner.

point

Each product can only be line-sheeted once (to prevent duplication).
However, you can create them as many times as you like from [Export].

Item composition ratios, etc., can be created at the touch of a button from the created line sheet.